
Table of Contents
The Practical Faucet Distance Rule
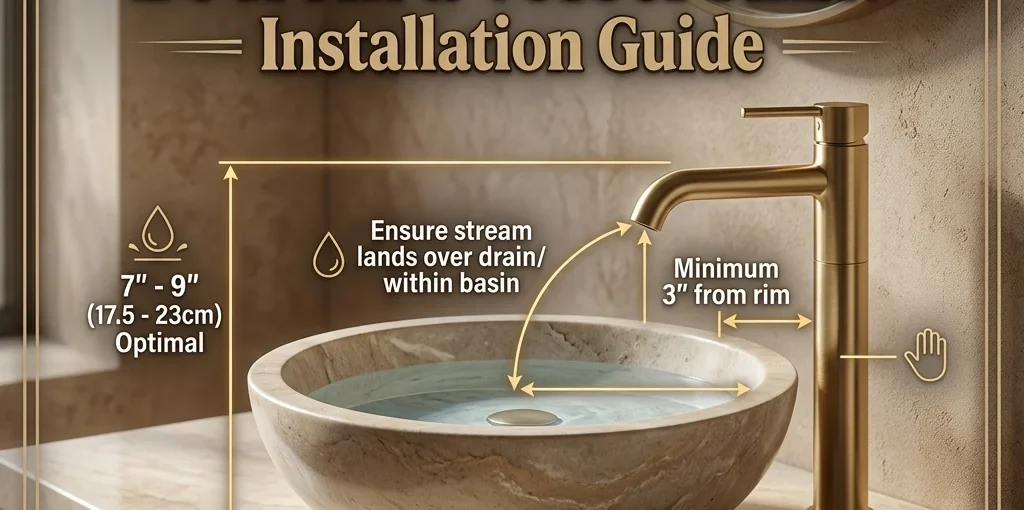
For most deck-mounted vessel sink faucets, the faucet hole center is usually placed about 2–4 inches behind the vessel sink rim, but the more important rule is this:
The faucet spout should direct water into the center area of the bowl, usually near the drain, without hitting the back wall or splashing toward the user.
There is no universal fixed distance because vessel sinks vary in diameter, rim height, bowl depth, shape, wall thickness, and drain position. A round ceramic vessel sink, a shallow rectangular stone basin, and a glass bowl sink may all require different faucet positions.
For commercial projects, the safest method is to calculate the position using:
Faucet hole center distance = sink back rim position + required clearance + faucet spout reach alignment
In practical terms:
| Installation Item | Typical Starting Point | Commercial Project Note |
|---|---|---|
| Distance from faucet hole center to sink outer back rim | 2–4 in / 50–100 mm | Adjust based on faucet base size, handle clearance, and backsplash |
| Water landing point | Near bowl center or slightly behind drain | Avoid hitting the back wall of the bowl |
| Distance from faucet base to backsplash | 1.5–2.5 in / 40–65 mm minimum | Leave room for handle operation and cleaning |
| Faucet spout height above sink rim | 4–8 in / 100–200 mm typical | Too high increases splash risk |
| Countertop hole diameter | Follow faucet drawing | Do not drill before final model approval |
For hotels, offices, serviced apartments, malls, hospitals, and public washrooms, this distance should always be verified with a mock-up before mass countertop drilling. A basic vessel faucet installation guide also recommends testing the faucet location in relation to the vessel sink before drilling so the water flows correctly into the bowl.
Why Faucet Distance Matters in Commercial Bathrooms
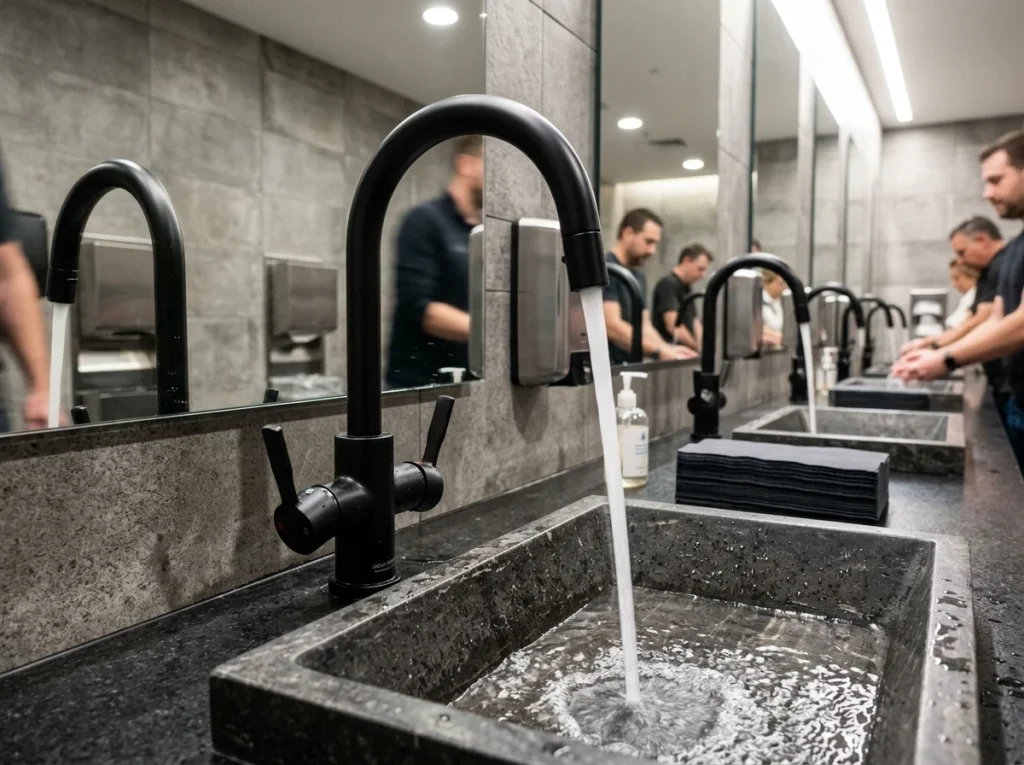
In a private bathroom, a small positioning error may be inconvenient. In a commercial project, the same mistake repeated across 100 or 500 rooms becomes a costly defect.
Poor faucet positioning can cause:
Water splashing onto countertops and floors, loose faucet bases from awkward user operation, poor handwashing comfort, difficult cleaning behind the sink, inaccessible handles, countertop drilling waste, and failed project handover inspections.
For commerce buyers and contractors, faucet distance is not only a design detail. It affects installation efficiency, maintenance cost, water control, customer experience, and long-term product durability.
In projects with accessible restrooms, faucet position also needs to coordinate with reach, clear floor space, knee clearance, exposed pipe protection, and operable controls. The U.S. Access Board notes that lavatory requirements cover clear floor space, height, faucets, exposed pipes, and related accessibility conditions.
For hotel, apartment, office, or public washroom projects, SourceZJ can review your vessel sink, faucet, countertop, and accessory drawings before bulk production. Explore commercial bathroom faucets for project-ready options.
1. The Correct Way to Measure Faucet Distance from a Vessel Sink
Many installation errors happen because teams measure from the wrong reference point. Do not measure only from the wall, only from the sink edge, or only from the countertop front. You need to coordinate four centerlines.
The four key reference points
| Reference Point | What It Means | Why It Matters |
|---|---|---|
| Sink drain centerline | Center of the drain hole | Helps align water landing point |
| Sink outer rim | Back edge of the vessel sink | Helps define minimum faucet clearance |
| Faucet hole centerline | Center of drilled countertop hole | Determines final faucet position |
| Faucet spout outlet | Point where water exits | Determines actual water landing point |
The faucet hole center is not always the same as the water outlet position. Some faucets have a short spout. Others extend forward significantly. Therefore, a faucet with a 5-inch spout reach can be mounted farther back than a faucet with a 3-inch spout reach.
Practical measuring formula
Use this simple method during design review:
Step 1: Mark the vessel sink drain center on the countertop drawing.
Step 2: Mark the back rim of the sink.
Step 3: Check the faucet spout reach from the product drawing.
Step 4: Position the faucet hole so the water stream lands near the bowl center or drain zone.
Step 5: Confirm the faucet base does not touch the sink, backsplash, wall, or mirror frame.
Step 6: Dry-fit the actual sink and faucet before drilling multiple countertops.
For commercial projects, the product drawing should show total height, spout height, spout reach, base diameter, shank length, hole diameter, hose connection, and recommended installation thickness.
SourceZJ can support this type of design-phase coordination through its OEM and custom bathroom hardware manufacturing service.
2. Recommended Faucet Distance by Sink Shape
The “best” distance changes depending on sink geometry. A deep round vessel sink is more forgiving than a shallow rectangular vessel sink. A square sink with vertical walls may splash more if the water hits the back wall. A glass bowl may require extra care because mounting rings and visual alignment are more obvious.
| Vessel Sink Type | Suggested Faucet Hole Position | Key Risk | Installation Advice |
|---|---|---|---|
| Round ceramic vessel sink | 2–4 in behind back rim | Usually moderate splash risk | Aim water near drain center |
| Oval vessel sink | 2.5–4 in behind rim | Spout may land too far back | Check long-axis bowl geometry |
| Rectangular vessel sink | 2–3.5 in behind rim | Higher splash risk at back wall | Avoid water hitting vertical rear wall |
| Shallow stone vessel sink | 2–3 in behind rim | Splash from low bowl depth | Use lower-flow aerator and correct spout height |
| Glass bowl vessel sink | 2–4 in behind rim | Stability and visual alignment | Confirm mounting ring and gasket details |
| Wall-mounted faucet with vessel sink | Based on wall-to-drain distance | Rough-in error is costly | Mock up before wall finishing |
This table gives starting points, not final engineering dimensions. The final location must be confirmed with the actual faucet reach and sink drawing.
Send SourceZJ your vessel sink drawing and desired faucet style to request a matching faucet recommendation and drilling-position review.
3. Faucet Spout Reach Is More Important Than Base Distance
Many project teams ask, “How far should the faucet be from the vessel sink?” A better question is:
Where should the water land inside the vessel sink?
The water stream should not hit the back wall of the bowl. It should not fall too close to the front rim. It should not land directly on a flat ledge where water can splash outward. In most vessel sink installations, the ideal landing area is near the drain or slightly behind it.
Example
Suppose your vessel sink is 16 inches wide from front to back, and the drain is centered 8 inches from the front edge. If the faucet is installed behind the sink, the spout reach must be long enough to bring the water stream toward the center zone of the bowl. If the spout reach is too short, water hits the back wall. If it is too long, water may splash toward the front.
For commercial projects, do not select faucets only by finish or appearance. Always compare:
Spout reach, spout height, mounting hole size, base diameter, handle clearance, countertop thickness compatibility, aerator type, water pressure range, and spare part availability.
For a coordinated project package, SourceZJ’s bathroom product category can help buyers match faucets with mirrors, towel racks, showers, and other bathroom accessories.
4. Distance from Faucet to Backsplash or Wall
The faucet also needs enough clearance behind it. This is especially important for single-handle vessel faucets where the handle moves backward or sideways.
A common commercial mistake is placing the faucet too close to the backsplash. The faucet may look correct on the drawing, but after installation the handle hits the wall, mirror frame, stone backsplash, or decorative panel.
Backsplash clearance checklist
| Item to Check | Recommended Practice | What Can Go Wrong |
|---|---|---|
| Handle movement | Confirm full open/close range | Handle hits backsplash |
| Cleaning space | Leave enough gap behind faucet | Dirt and water stains collect |
| Base diameter | Check full base width, not only shank size | Faucet base overlaps sink rim |
| Mirror frame | Confirm lower frame projection | Faucet handle conflicts with mirror |
| Wall-mounted accessories | Check soap dispenser and shelf position | User experience becomes crowded |
For most deck-mounted vessel faucets, keep at least 1.5–2.5 inches between the back of the faucet base and the backsplash where possible. Larger faucets or rear-handle designs may need more.
In accessible commercial bathrooms, faucet controls must also be easy to operate. ADA guidance states that faucet controls and other manually operated elements must be usable with one hand, without tight grasping, pinching, twisting, or more than five pounds of force.
5. Distance from Faucet to Sink Rim
The gap between the faucet base and the vessel sink rim should be large enough for installation, cleaning, and seal maintenance, but not so large that the spout cannot reach the bowl properly.
As a general starting point:
Leave about 1–2 inches of visible countertop clearance between the faucet base and the sink rim where possible.
This is not the same as the faucet hole center distance. A faucet base may be 2 inches wide, while the drilled hole sits in the middle. Always account for the full base diameter.
Example
If the faucet base diameter is 2 inches and you want 1 inch of clearance from the sink rim to the faucet base, the faucet hole center may need to be around 2 inches from the sink rim:
1 inch clearance + 1 inch base radius = 2 inches from rim to hole center.
If the faucet base is larger, the hole center must move farther back. If the spout reach is short, moving the faucet farther back may create poor water landing. This is why faucet base size and spout reach must be checked together.
6. Faucet Height: How High Above a Vessel Sink?
Distance is not only horizontal. Height matters just as much.
A faucet that is too low makes handwashing uncomfortable. A faucet that is too high can increase splashing, especially with shallow vessel sinks. For many vessel sink faucets, the spout outlet is positioned several inches above the sink rim, but the best height depends on bowl depth and water pressure.
Practical height guidelines
| Sink Condition | Recommended Faucet Height Approach | Reason |
|---|---|---|
| Deep round bowl | Medium to tall vessel faucet | Bowl can contain water impact better |
| Shallow basin | Lower spout height preferred | Reduces splash |
| Tall vessel sink | Check total user height | Countertop may need to be lower |
| Public restroom | Avoid excessive height and flow | Reduces water on floor |
| Hotel guest room | Balance comfort and visual style | Supports premium user experience |
For vessel sinks, remember that the countertop height plus sink height determines the final rim height. In commercial projects, especially hotels and accessible restrooms, this must be reviewed early.
7. Commercial Installation Workflow: From Drawing to Drilling
For one bathroom, an installer may adjust on site. For a commercial building, the process must be standardized.
Step 1: Confirm the sink and faucet drawings
Before drilling, confirm the approved sink model and faucet model. Check sink size, drain position, faucet spout reach, base diameter, hole size, shank length, and countertop thickness range.
Step 2: Create a plan-view layout
Mark the sink drain centerline, outer rim, faucet hole centerline, wall line, backsplash line, and countertop edge. This layout should be approved before production.
Step 3: Dry-fit the actual products
Place the vessel sink and faucet on a sample countertop or mock-up vanity. Check water landing, handle movement, cleaning clearance, and visual alignment. Manufacturer-style installation guidance commonly recommends following the faucet instructions and testing the location before drilling.
Step 4: Drill only after approval
Stone, quartz, and solid surface countertops should be drilled using the correct tool, hole size, and support method. Do not allow each installer to “estimate” the hole position.
Step 5: Install faucet and sink
Install the faucet with its gasket, washer, mounting nut, and supply hoses. Then install the vessel sink, drain, gasket, and trap. Some vessel sink materials may require a mounting ring for stability, especially glass or certain metal vessel sinks.
Step 6: Test water flow and leaks
Open the water supply slowly. Test hot and cold operation, flow direction, splash, drainage speed, faucet stability, and leakage at the base, hoses, drain, and trap.
Step 7: Record the approved dimensions
Once the mock-up is approved, record the final faucet hole center distance, sink position, hole diameter, product model, and room type. Use this as the project standard.
SourceZJ can help contractors and importers prepare a faucet positioning checklist for hotel, apartment, office, and public bathroom projects.
8. Licensed Plumber Requirements for Commercial Projects
For commercial buildings, vessel sink faucet installation often requires qualified plumbing professionals. This is especially true when the work involves new water supply lines, drainage modifications, connection to main risers, inspection, pressure testing, or public-use facilities.
The Uniform Plumbing Code is described by IAPMO as a resource covering different installation types, including commercial buildings, homes, and other facilities. (IAPMO)
Use a licensed plumber or qualified plumbing contractor when:
The project is a hotel, mall, hospital, school, office tower, airport, or public facility; plumbing lines are being rerouted; shut-off valves are being relocated; wall-mounted faucets require concealed rough-in; inspection approval is required; sensor faucets include solenoid valves or power connections; or accessible restroom compliance must be confirmed.
A faucet distance error in a wall-mounted installation is more serious than in a deck-mounted installation because the wall may already be tiled or finished. For wall-mounted vessel faucets, mock-up approval before wall closure is essential.
9. Common Faucet Distance Mistakes
Mistake 1: Placing the faucet too far back
When the faucet is too far behind the vessel sink, the water stream hits the rear wall of the bowl. This causes splash, noise, and poor handwashing comfort.
Correction: Move the faucet forward or choose a faucet with longer spout reach.
Mistake 2: Placing the faucet too close to the sink
If the faucet base is too close to the vessel rim, cleaning becomes difficult and the base may interfere with sink installation.
Correction: Leave enough visible countertop clearance and confirm base diameter before drilling.
Mistake 3: Ignoring handle clearance
A faucet may appear correctly positioned until the handle is opened. Rear-handle faucets often need more backsplash clearance.
Correction: Test the full handle movement during dry-fit.
Mistake 4: Choosing faucet height by appearance only
A tall faucet may look premium but splash badly with a shallow bowl.
Correction: Test actual water flow in the mock-up.
Mistake 5: Drilling countertops before final faucet approval
This is one of the most expensive commercial mistakes. If the faucet model changes after drilling, the countertop may not be usable.
Correction: Freeze faucet drawings before countertop fabrication.
Mistake 6: No standard template for repeated rooms
Different installers may drill slightly different positions across rooms.
Correction: Use a drilling template or CNC countertop production drawing.
10. Procurement Checklist for commerce Buyers
When buying vessel sink faucets for commercial projects, ask suppliers for more than product photos.
| Supplier Document / Data | Why It Matters |
|---|---|
| 2D technical drawing | Confirms spout reach, height, base size, and hole requirement |
| Installation manual | Shows mounting sequence and required accessories |
| Countertop thickness range | Prevents loose or incompatible installation |
| Finish sample | Confirms visual consistency before bulk production |
| Cartridge specification | Affects long-term leakage and handle performance |
| Aerator type | Helps control splash and flow |
| Hose connection size | Prevents site connection mismatch |
| Spare parts list | Reduces after-sales maintenance risk |
| Packaging method | Protects finish during export and site handling |
| Batch QC process | Supports consistent multi-room installation |
SourceZJ supports OEM/ODM and project-based procurement for commercial bathroom accessories. Buyers can also coordinate faucets with commercial bathroom mirrors, hotel-style bathroom towel racks, and other bulk commercial bath accessories.
FAQ: Faucet Distance from Vessel Sink
Conclusion
The best faucet distance from a vessel sink is not a fixed number. A good starting point is 2–4 inches from the sink’s back rim to the faucet hole center, but the final position must be based on spout reach, sink shape, water landing point, faucet base size, backsplash clearance, and user comfort.
For commercial projects, the safest process is to approve drawings, build a mock-up, test real water flow, standardize the drilling template, and then proceed with bulk installation. This approach prevents splash problems, countertop rework, inconsistent room appearance, and maintenance issues after handover.
SourceZJ helps contractors, importers, hotel groups, and commercial bathroom buyers coordinate faucets, vessel sinks, mirrors, towel racks, showers, and other bathroom hardware for project use. To reduce installation risk before production, contact SourceZJ through its custom bathroom accessories supplier and OEM manufacturer page and request a faucet positioning review for your next commercial bathroom project.
 English
 العربية
 Русский
 Español